Display the Velocity Field
For the velocity data, we will use the ParaView streamline filter.
1. Disable Automatic Changes
Because the default streamline filter can consume significant CPU resources, first disable the default modelbuilder behavior to automatically apply changes to the render view. To do this, find the “Apply Changes Automatically” button (  ) and click it to the off state (it’s a toggle button).

2. Create Stream Tracer Filter
There are several ways to add a streamline filter to the display, the easiest is to find and click the “Stream Tracer” tool button (  ). You can also use the menu item.

3. Click the Apply Button
Click the Apply button at the top of the Properties tab to update the 3D view. It might take several seconds for modelbuilder to be responsive after this, because the default stream tracer settings can use alot of CPU cycles.
4. Set the Line Geometry
To set the streamline properties, we will to open the Properties view (from which nearly all visualization features are accessed). To open this view, go to the View menu and check the box next to Properties. When the Properties view appears in the sidebar, undock it and drag it over the other tabbed views to dock it as another tab.
The Properties view has three top-level, collapsible sections labeled Properties (StreamTracer1), Display (GeometryRepresentation), and View (Render View). Because the contents of the Properties view are extensive, we suggest that you collapse all three sections to start, and open them one at a time when working with this view.
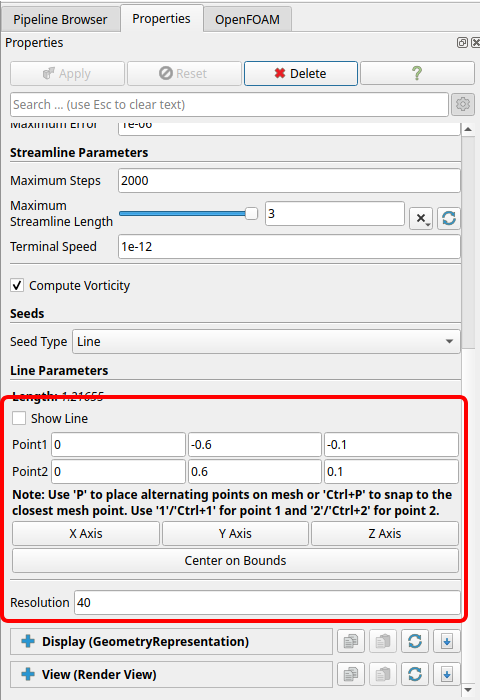
To set the streamline properties, go to the Properties panel and open the first section, which is now labeled Properties (StreamTracer1). In the Line Parameters subsection:
Set the Point1 fields to
0.0-0.6-0.1.Set the Point2 fields to
0.00.60.1.You can also uncheck the Show Line box.
Just below the Line Parameters subsection, set the Resolution field to
40.
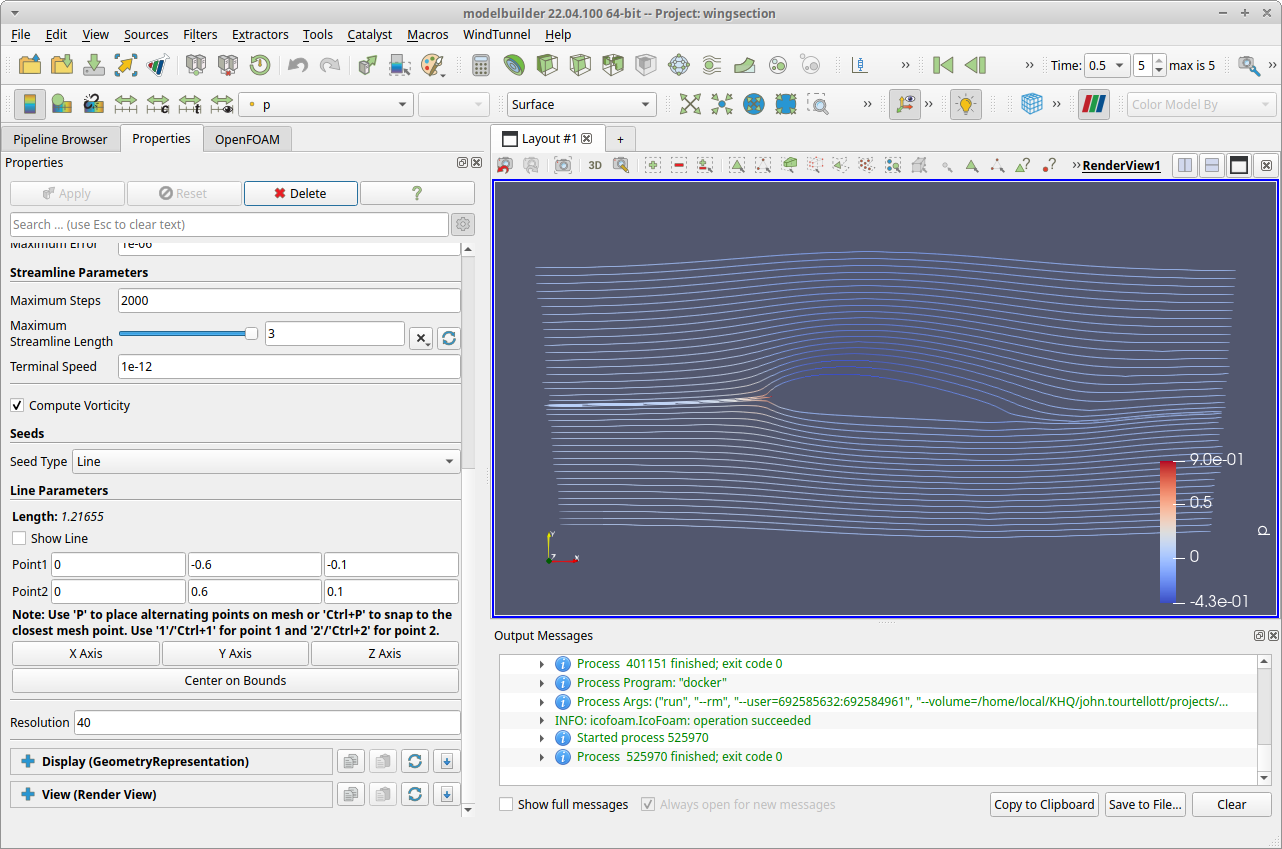
5. Click the Apply Button
Click the Apply button at the top of the Properties tab to update the 3D view.
6. More Visual Features
6.1 Wing section geometry: If you want to include the wingsection model in the display, you can go back to the OpenFoam view (tab), select the Model sub-tab and click the Show Data button near the top of the tab.
6.2 Streamline tubes: To display more aesthetic streamlines:
Close the Properties (StreamTracer1) section.
Click the
button (near the top of the Properties view) to display advanced properties.
Expand the Display (GeometryRepresentation) section.
Find the Styling subsection.
In the Styling subsection, set the Line Width field to
4.In the Styling subsection, check the box next to Render Lines As Tubes.
7. Enable Automatic Changes
Before leaving your work, be sure to re-enable the “Apply Changes Automatically” button ( ). (Otherwise, you will need to click the Apply when you make other changes like importing geometry files.)